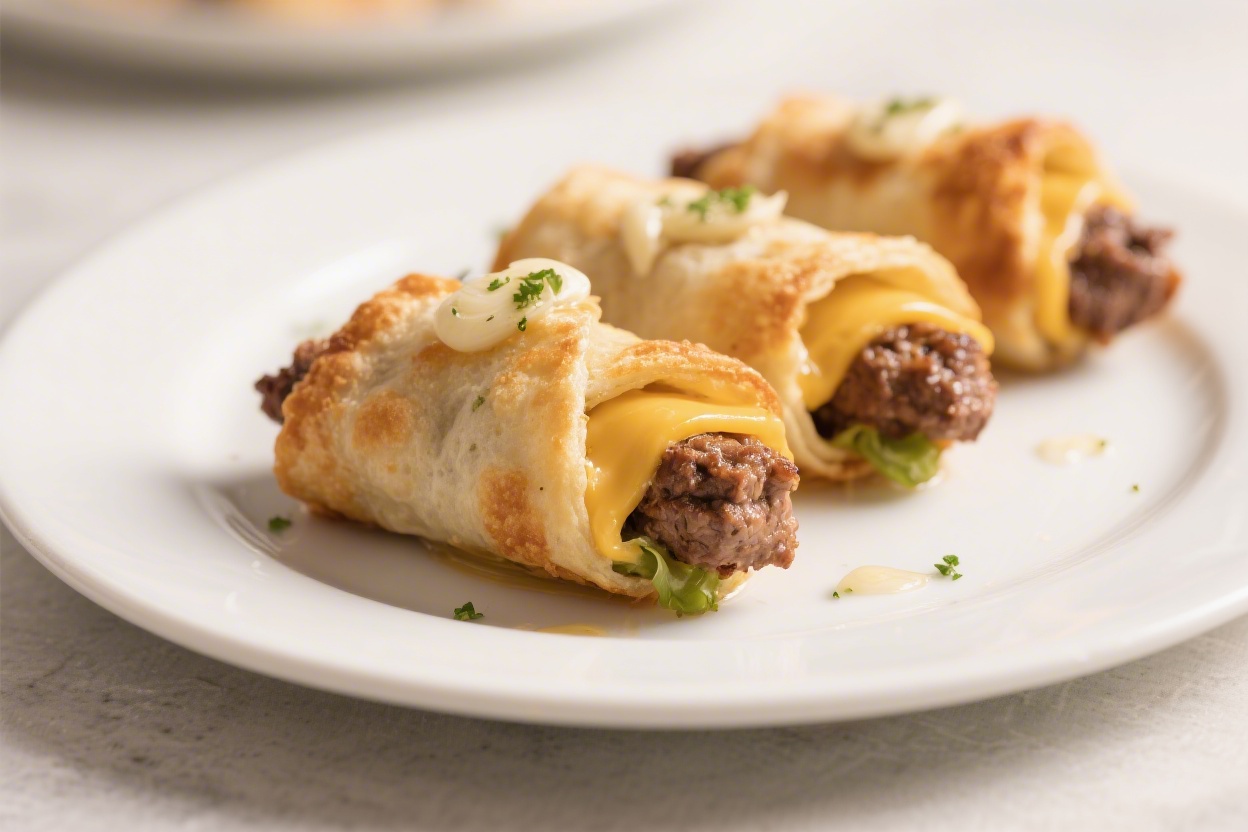
If you love cheeseburgers but want something a little more snackable, these Garlic Butter Beef Cheeseburger Roll Ups are perfect. They’re crispy on the outside, juicy and cheesy inside, and brushed with a garlicky butter that makes the whole kitchen smell amazing. They work as a game-day snack, a quick dinner, or a lunchbox win.
You don’t need fancy tools or complicated steps—just pantry basics and a hot pan or oven. Let’s make a batch that disappears fast.
Contents
What Makes This Special
These roll ups combine everything you love about a classic cheeseburger—savory beef, melty cheese, a hint of pickle and onion—tucked into a golden, crunchy wrapper. The garlic butter finish adds a simple but bold flavor that makes them taste like more effort than they are.
They cook quickly, so you can make them fresh anytime without a big production. And they’re endlessly customizable, so everyone gets what they like.
What You’ll Need
- 1 pound (450 g) ground beef (80/20 or 85/15 works best)
- 1 small yellow onion, finely diced
- 2 cloves garlic, minced
- 1 teaspoon kosher salt (plus more to taste)
- 1/2 teaspoon black pepper
- 1 teaspoon smoked paprika (optional but great)
- 2 tablespoons ketchup
- 1 tablespoon yellow mustard
- 1 tablespoon Worcestershire sauce
- 8–10 slices cheddar or American cheese (or shredded cheese, about 1 1/2 cups)
- 8–10 small flour tortillas (6–8 inch) or egg roll wrappers
- 2 tablespoons dill pickles, finely chopped (optional but classic)
- 3 tablespoons unsalted butter
- 1 teaspoon garlic powder (for the butter)
- 1 tablespoon fresh parsley, finely chopped (optional, for finish)
- 2–3 tablespoons neutral oil (for pan-searing) or cooking spray (for baking/air-frying)
How to Make It
- Cook the beef. Heat a large skillet over medium-high. Add ground beef and cook, breaking it up, until browned with little pink left, about 5–7 minutes.Drain excess fat if needed.
- Add aromatics and seasoning. Stir in onion and minced garlic. Cook 2–3 minutes until softened. Season with salt, pepper, and smoked paprika.
- Build the burger flavor. Stir in ketchup, mustard, and Worcestershire.Cook 1–2 minutes to thicken slightly. Taste and adjust salt or mustard as needed. Remove from heat and let it cool 3–5 minutes so it’s easier to roll.
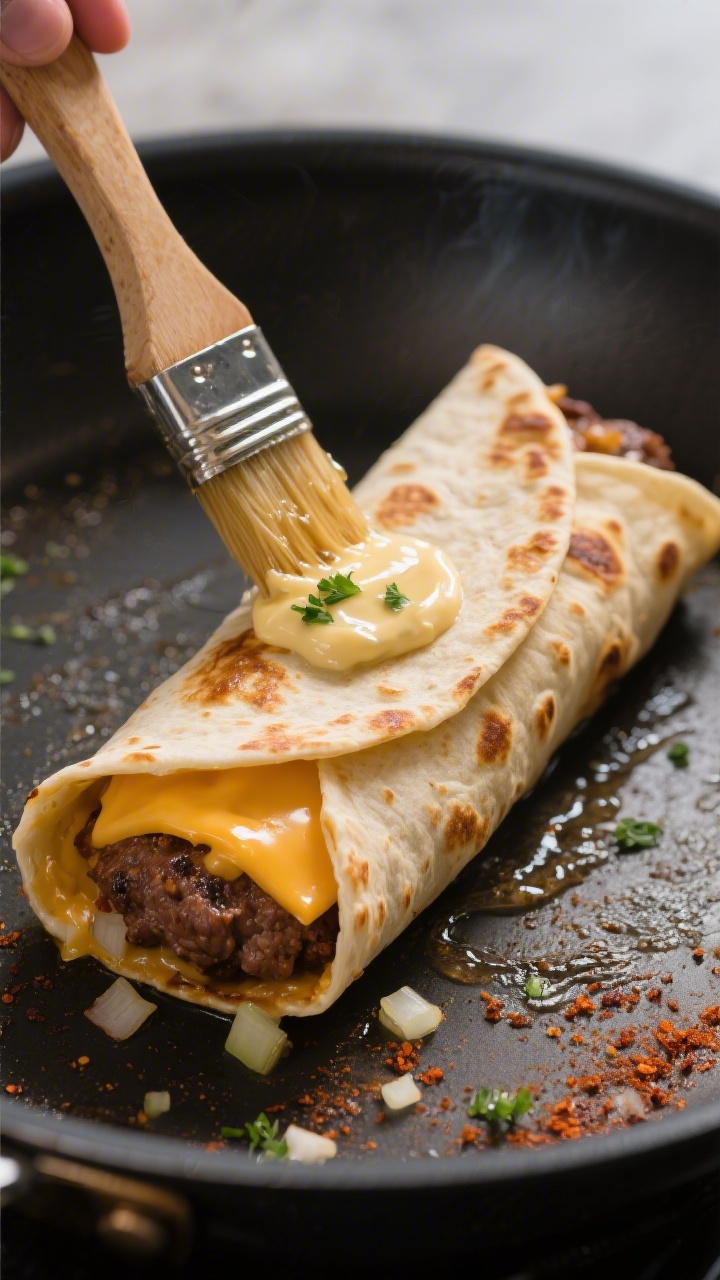
- Prep the garlic butter. In a small bowl, melt butter.Stir in garlic powder and parsley. Set aside.
- Warm the tortillas. Microwave tortillas for 20–30 seconds under a damp paper towel or quickly toast them in a dry skillet. Warm tortillas roll without cracking.
- Assemble the roll ups. Lay a tortilla flat. Add a slice of cheese (or a small handful of shredded), spoon 2–3 tablespoons of beef over the center, and sprinkle a little chopped pickle.Fold the sides in, then roll tightly from the bottom up. Repeat with remaining tortillas.
- Crisp them up (pan method). Heat 1–2 tablespoons oil in a nonstick skillet over medium. Place roll ups seam-side down.Cook 2–3 minutes per side until golden and crisp. Brush with garlic butter right in the pan during the last minute. Do not crowd the pan.
- Or bake/air-fry. For baking: heat oven to 425°F (220°C). Place roll ups on a parchment-lined sheet, seams down.Lightly brush with oil or spray. Bake 10–14 minutes, turning once, until golden. Brush with garlic butter as soon as they come out.
For air fryer: 390°F (200°C) for 8–10 minutes, flipping halfway, then brush with garlic butter.
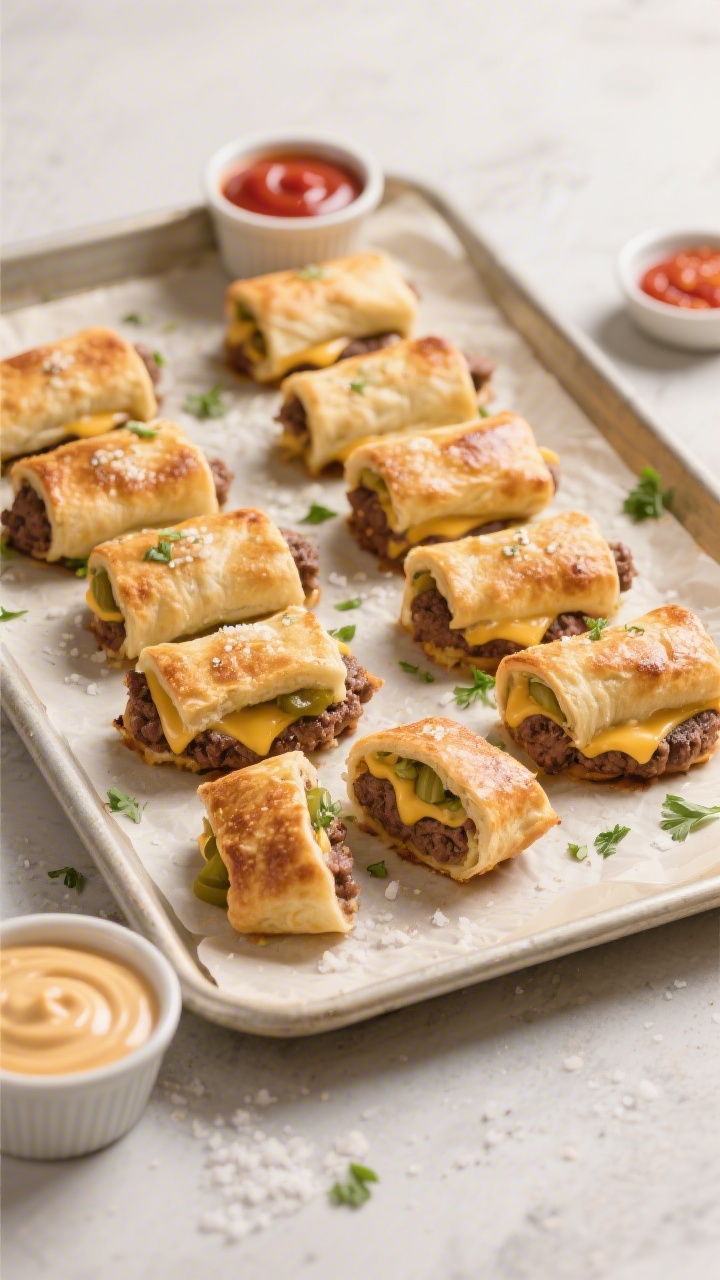
- Rest and serve. Let them sit 2 minutes to set the cheese. Slice in half if serving for a crowd. Add dipping sauces like burger sauce, ketchup, or spicy mayo.
Keeping It Fresh
Store cooled roll ups in an airtight container for up to 3 days.
Line the bottom with a paper towel to catch moisture. Reheat in a skillet over medium heat or in a 375°F (190°C) oven/air fryer for 6–8 minutes to bring back the crisp. Freeze before crisping for up to 2 months: assemble, place on a tray to freeze solid, then bag.
Bake or air-fry from frozen, adding a few extra minutes, and brush with garlic butter at the end.

Why This is Good for You
- Protein-packed: Ground beef gives staying power, helping you feel full longer.
- Portion control: Individual roll ups make it easy to track how much you’re eating.
- Customizable veggies: Add sautéed peppers, mushrooms, or shredded lettuce after cooking for extra nutrients.
- Balanced swaps: Use whole-wheat tortillas, leaner beef, or part-skim cheese to lighten it up without losing flavor.
Pitfalls to Watch Out For
- Soggy roll ups: Overly wet filling makes tortillas soft. Cook the beef mixture until most moisture evaporates.
- Tortillas tearing: Cold, stiff tortillas crack. Warm them briefly so they roll tight.
- Cheese leakage: Overfilling is the main culprit.Use 2–3 tablespoons of beef and roll firmly with the seam down in the pan.
- Bland flavor: Under-seasoning the beef leads to a flat taste. Salt to taste and don’t skip the mustard/Worcestershire combo.
- Greasy results: If your beef is very fatty, drain excess grease before adding sauces to keep things crisp.
Variations You Can Try
- Bacon cheeseburger: Add crisp bacon bits to the filling or tuck a half strip into each roll before crisping.
- Spicy kick: Mix in diced jalapeños, hot sauce, or pepper jack cheese. Finish with a chili-garlic butter instead of plain.
- Pickle lovers: Spread a thin layer of dill pickle relish on the tortilla before adding the beef.
- Big Mac vibes: Add shredded lettuce after crisping and drizzle with thousand island or “special sauce.”
- Mushroom-Swiss: Swap cheddar for Swiss and stir in sautéed mushrooms with thyme.
- Low-carb: Use low-carb tortillas or egg wraps.Air-fry to keep them crisp without extra oil.
- Sloppy Joe twist: Add a touch more ketchup, a spoon of brown sugar, and a splash of vinegar to the beef for tangy-sweet notes.
- Breakfast roll ups: Stir in scrambled eggs and use American or Colby Jack. Dip in ketchup or chipotle mayo.
FAQ
Can I use ground turkey instead of beef?
Yes. Use 93% lean turkey and add a teaspoon of oil when browning to prevent drying out.
Bump up the Worcestershire and mustard for richer flavor, and don’t overcook.
What cheese melts best for these?
American, cheddar, Monterey Jack, or Colby Jack all melt smoothly. For a bolder bite, try pepper jack. Shredded cheese melts quickly and spreads more evenly.
Do I have to use tortillas?
No.
Egg roll wrappers make extra-crispy edges, and crescent dough gives a softer, buttery result. Adjust cooking methods: pan-fry or air-fry for wrappers, bake for dough.
How do I keep the roll ups from opening while cooking?
Roll snugly and place them seam-side down in the hot pan first. If using egg roll wrappers, brush the edge with a little water to seal.
Don’t move them for the first minute to let a crust form.
What dipping sauces go well with these?
Classic ketchup, mustard, or a quick burger sauce made from mayo, ketchup, mustard, relish, and a dash of paprika. Spicy mayo, chipotle ranch, or barbecue sauce are great too.
Can I make them ahead?
Yes. Assemble up to a day ahead, cover, and refrigerate.
Crisp just before serving, then brush with garlic butter. For longer storage, freeze uncrisped and cook from frozen.
How many does this recipe serve?
It makes about 8–10 roll ups, depending on tortilla size and how generously you fill them. Plan on 2–3 per adult for a meal, 1–2 for a snack.
Wrapping Up
These Garlic Butter Beef Cheeseburger Roll Ups deliver all the comfort of a classic burger in a quick, crispy package.
They’re simple, flexible, and guaranteed to disappear fast. Keep a pack of tortillas, some cheese, and ground beef on hand, and you’ll always be 20 minutes away from a snack that tastes like a win. Brush with that garlicky butter, serve hot, and enjoy the crunch with every bite.