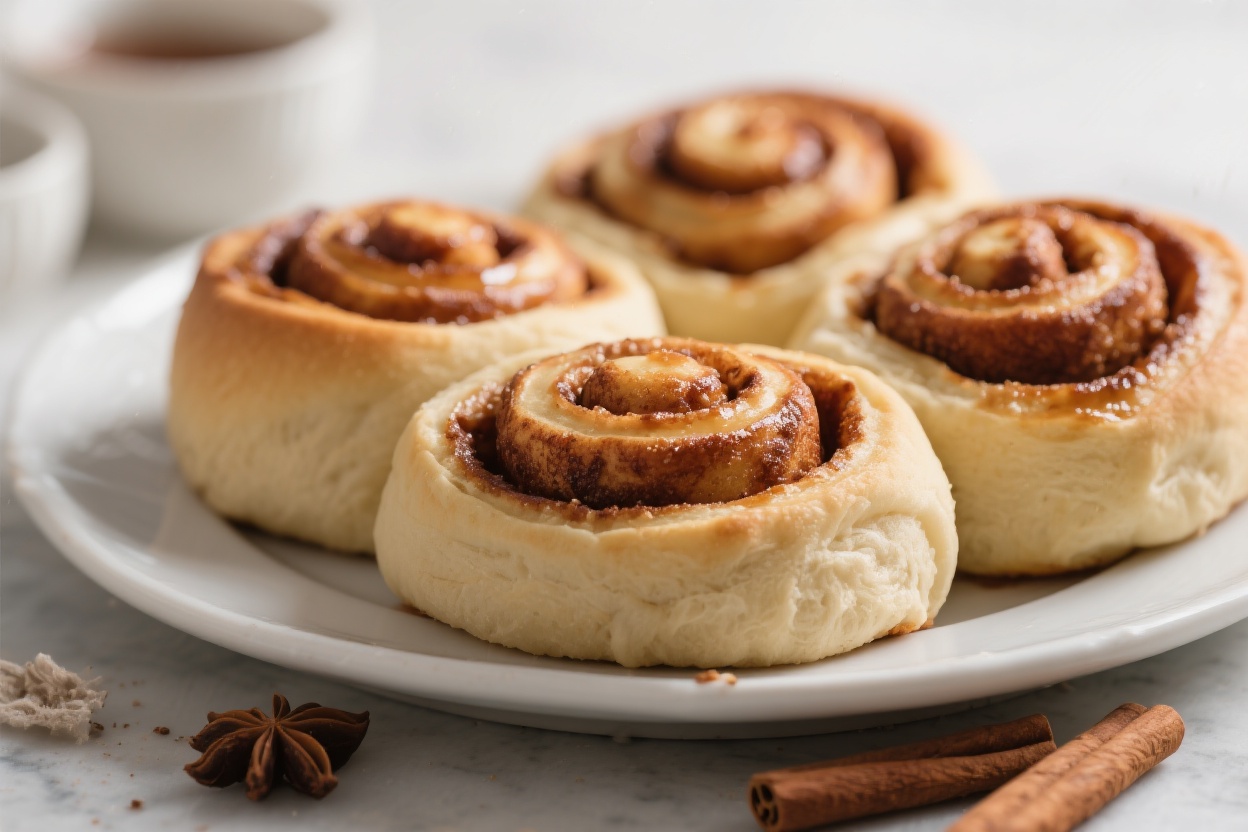
Skip the hours of proofing and still enjoy warm, gooey cinnamon rolls that taste like a weekend treat. This no-yeast version comes together quickly with simple pantry staples and a soft, biscuit-style dough. The rolls bake up tender, swirled with buttery cinnamon sugar, and topped with a dreamy vanilla glaze.
You’ll get all the cozy flavor without extra steps or special equipment. If you’ve ever craved cinnamon rolls on a whim, this is your go-to recipe.
Contents
What Makes This Recipe So Good
- No waiting for dough to rise: Baking powder does the lifting, so you can bake right away.
- Simple pantry ingredients: Flour, sugar, milk, and butter—nothing fancy or hard to find.
- Soft, tender texture: The dough is like a rich biscuit, so the rolls stay moist and fluffy.
- Big cinnamon flavor: A classic brown sugar cinnamon swirl and a simple vanilla glaze bring bakery vibes.
- Foolproof method: Clear steps and helpful tips keep the dough easy to handle, even for beginners.
Shopping List
- For the dough:
- 2 1/4 cups all-purpose flour (plus extra for dusting)
- 2 tablespoons granulated sugar
- 1 tablespoon baking powder
- 1/2 teaspoon baking soda
- 1/2 teaspoon fine salt
- 6 tablespoons cold unsalted butter, cut into small cubes
- 3/4 cup whole milk (or buttermilk)
- 1 teaspoon vanilla extract
- For the filling:
- 1/2 cup packed brown sugar
- 1 1/2 tablespoons ground cinnamon
- 1/8 teaspoon fine salt
- 4 tablespoons unsalted butter, softened
- For the glaze:
- 1 cup powdered sugar
- 2–3 tablespoons milk
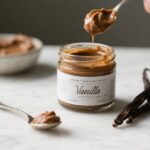
- 1/2 teaspoon vanilla extract
- Pinch of salt
- Optional: 1/4 teaspoon ground cardamom or nutmeg for the filling, chopped pecans or walnuts
Step-by-Step Instructions
- Preheat and prep: Heat your oven to 375°F (190°C). Lightly grease an 8- or 9-inch round cake pan or line it with parchment, letting the paper overhang for easy lifting.
- Mix the dry ingredients: In a large bowl, whisk the flour, granulated sugar, baking powder, baking soda, and salt until well combined.
- Cut in the butter: Add the cold butter cubes.Use a pastry cutter or your fingertips to work the butter into the flour until it looks like coarse crumbs with pea-sized bits. Keep it slightly chunky for a tender dough.
- Add wet ingredients: Stir the milk and vanilla together. Pour into the flour mixture and gently mix with a fork until a shaggy dough forms.Avoid overmixing.
- Bring it together: Turn the dough onto a lightly floured surface. Knead gently 4–6 times just until smooth. If it’s sticky, dust with a little more flour.
- Roll out the dough: Pat and roll into a rectangle about 10×14 inches and 1/4-inch thick.Keep the edges as even as you can.
- Make the filling: In a small bowl, combine brown sugar, cinnamon, and salt. Spread the softened butter evenly over the dough, then sprinkle on the cinnamon sugar. Press it lightly to help it stick.
- Roll and cut: Starting from the long side, roll the dough tightly into a log.Pinch the seam to seal. Trim the ends if uneven, then slice into 9 equal rolls with a sharp knife or dental floss.
- Pan the rolls: Arrange the rolls in the prepared pan with a little space between them. If any filling escapes, spoon it back on top.
- Bake: Bake for 20–25 minutes, until the rolls are puffed and just golden around the edges.The centers should look set, not doughy.
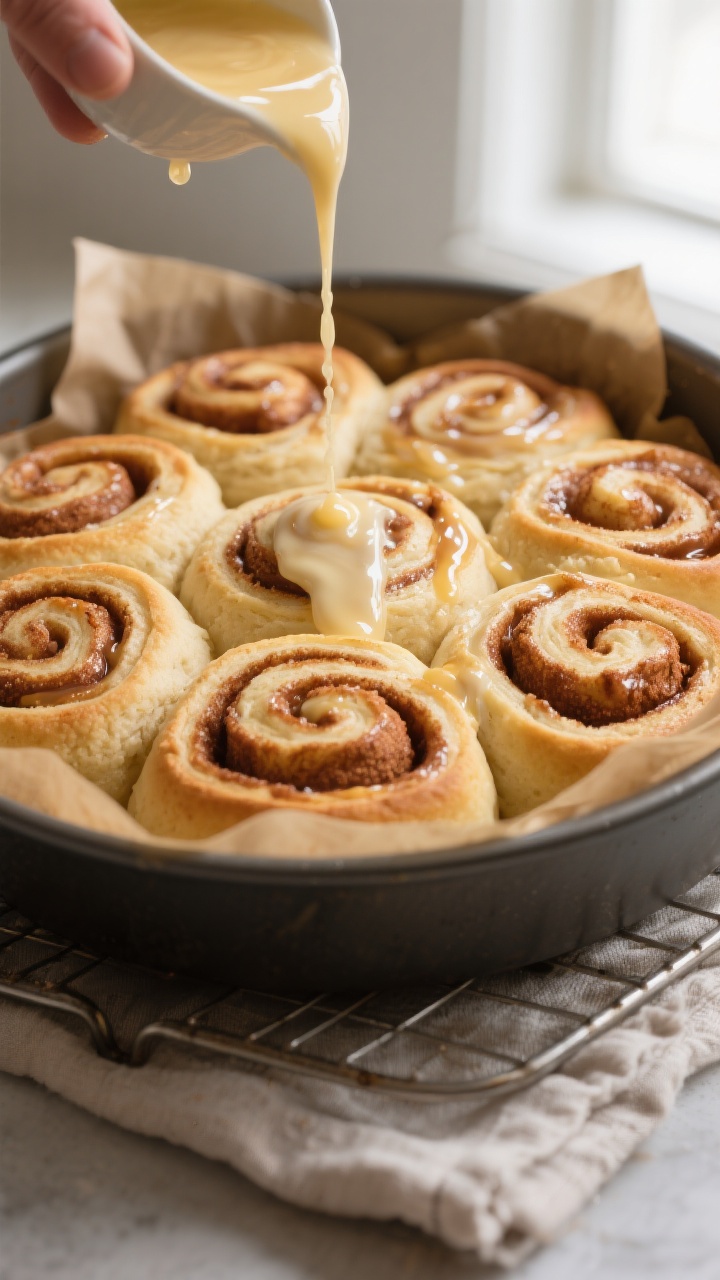
- Make the glaze: While the rolls bake, whisk powdered sugar, milk, vanilla, and a pinch of salt until smooth and pourable. Add a splash more milk if needed.
- Glaze and serve: Let the rolls cool for 5–10 minutes, then drizzle generously with glaze. Serve warm.
How to Store
- Room temperature: Keep covered for up to 2 days.Rewarm in the microwave for 10–15 seconds to soften.
- Refrigerator: Store in an airtight container for 4 days. Warm before eating for the best texture.
- Freezer: Freeze baked, unglazed rolls for up to 2 months. Thaw overnight in the fridge, warm in a 300°F (150°C) oven for 10 minutes, then glaze.
- Make-ahead: Assemble, cover, and refrigerate unbaked rolls for up to 12 hours.Bake straight from the fridge, adding 2–3 extra minutes.
Why This is Good for You
- Reduced hassle, less stress: No yeast means no proofing or timing anxiety. You can bake when you want and enjoy the process.
- Control over ingredients: You choose the sugar levels, dairy type, and any add-ins. Use less glaze or swap in lower-fat milk if you prefer.
- Spice benefits: Cinnamon brings cozy flavor and naturally complements sweetness, so you don’t need as much sugar to feel satisfied.
- Portion awareness: This recipe makes 9 rolls—enough to share without piles of leftovers calling your name.
Pitfalls to Watch Out For
- Overworking the dough: Too much kneading makes tough rolls.Stop as soon as the dough comes together.
- Warm butter in the dough: Keep it cold before baking. Cold butter = flakier, softer texture.
- Rolling too thin: If the dough is paper-thin, it tears and leaks filling. Aim for about 1/4 inch thick.
- Overbaking: No-yeast rolls dry out faster than traditional dough.Pull them when lightly golden and set in the center.
- Too much flour while rolling: Excess flour makes dry, dense rolls. Dust lightly—just enough to prevent sticking.
Variations You Can Try
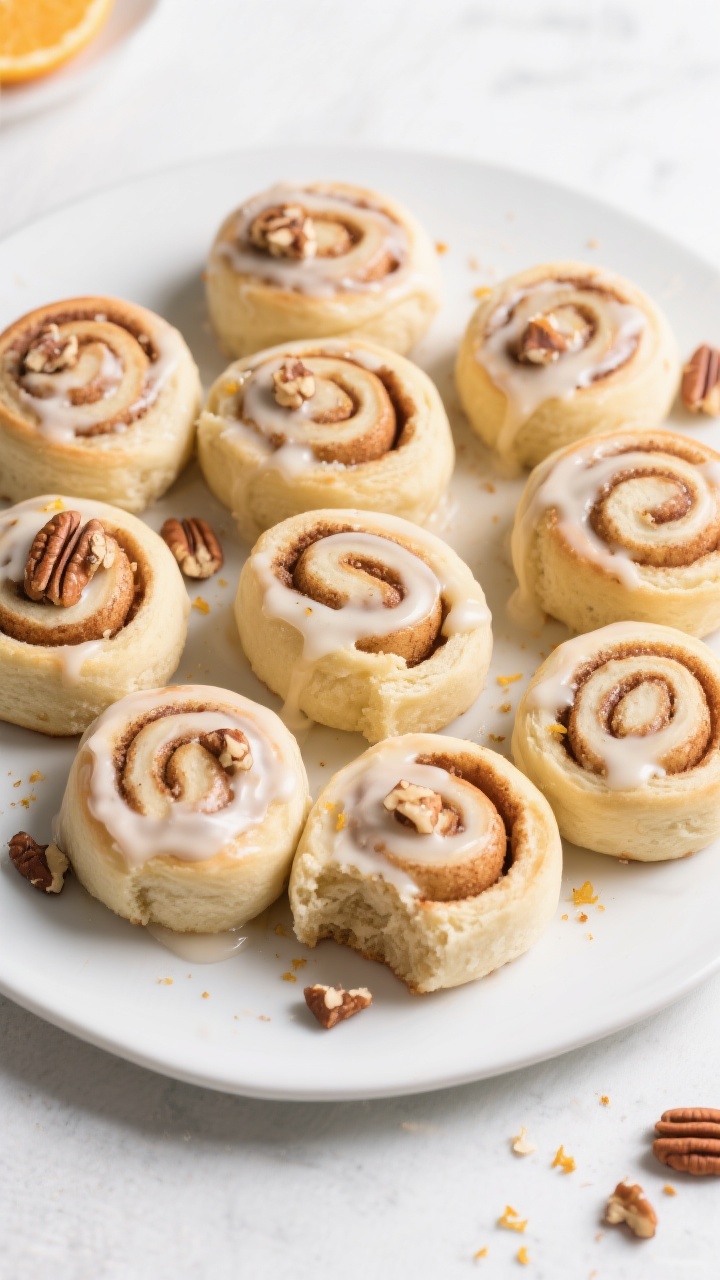
- Maple Pecan: Add 1/2 teaspoon maple extract to the glaze and sprinkle 1/3 cup chopped pecans over the filling.
- Orange Cinnamon: Zest one orange into the dough and use orange juice instead of milk in the glaze.
- Chocolate Swirl: Mix 2 tablespoons cocoa powder into the filling and add mini chocolate chips.
- Apple Pie Rolls: Finely dice 1 small apple and scatter over the filling with a pinch of nutmeg. Bake a few extra minutes.
- Cream Cheese Glaze: Beat 3 ounces softened cream cheese with 1 tablespoon butter, then add powdered sugar and milk to reach a pourable glaze.
- Dairy-Free: Use plant-based butter and non-dairy milk; the texture stays soft and the flavor is still rich.
FAQ
Can I make these gluten-free?
Yes.
Use a good-quality 1:1 gluten-free baking flour that includes xanthan gum. The dough may be a bit more delicate; chill it for 10–15 minutes before rolling to make it easier to handle.
What if I only have salted butter?
Use it and reduce the added salt in the dough to a small pinch. The flavor will still be balanced.
Do I need buttermilk?
No.
Whole milk works well. If you want extra tenderness and tang, add 1 teaspoon lemon juice or vinegar to the milk and let it sit for 5 minutes before using.
Why are my rolls dry?
They were likely overbaked or the dough was overfloured. Bake until just set and lightly golden, and use only enough flour on the counter to prevent sticking.
How do I cut clean spirals?
Unflavored dental floss works best.
Slide it under the log, cross the ends on top, and pull tight to slice without squashing the dough.
Can I double the recipe?
Yes. Bake in a 9×13-inch pan and add a few minutes to the bake time, checking for set centers and light golden edges.
Can I reduce the sugar?
You can cut the filling sugar to 1/3 cup and use a thinner glaze. The cinnamon flavor will still shine.
In Conclusion
These no-yeast cinnamon rolls deliver everything you love—warm layers, buttery cinnamon sugar, and a silky glaze—in a fraction of the time.
The dough is simple, the steps are clear, and the results feel special enough for a holiday morning or a cozy afternoon snack. Keep this recipe handy for last-minute cravings and easy weekend baking. One pan, a handful of ingredients, and you’re minutes away from fresh, homemade rolls.
Printable Recipe Card
Want just the essential recipe details without scrolling through the article? Get our printable recipe card with just the ingredients and instructions.