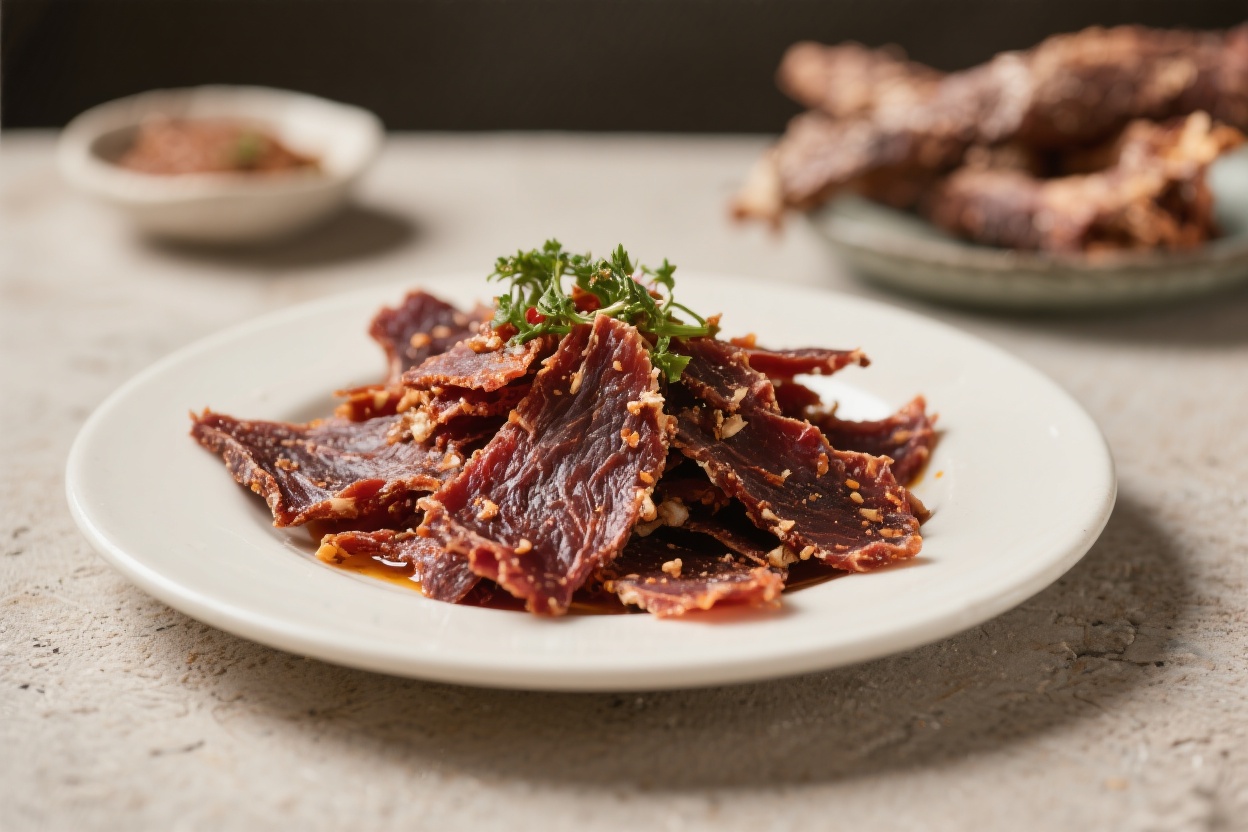
Biltong is South Africa’s cherished dried meat snack, known for its deep, savory flavor and satisfying chew. It’s the kind of food that feels rustic but special, like something passed down through generations. Making it at home is easier than you might think, and you don’t need fancy equipment.
All you need is good beef, a few key spices, and patience. Follow this simple method for authentic, reliable results.
Contents
Why This Recipe Works
This traditional biltong recipe leans on a few classic ingredients to deliver big flavor without fuss. Vinegar and salt do the heavy lifting by seasoning the meat and creating an environment that discourages spoilage during drying. Coriander brings that signature warm, citrusy aroma, while a hint of brown sugar balances the salt and acid. The process is straightforward: season, marinate, dry.
You control the thickness, drying time, and final texture, so your biltong comes out exactly how you like it.
What You’ll Need
- Beef: 1.5–2 kg (3–4 lb) of lean beef like silverside (bottom round), topside (top round), or eye of round
- Coarse salt: 2.5 tbsp (use non-iodized if possible)
- Coriander seeds: 3 tbsp, toasted and coarsely crushed
- Black pepper: 2 tsp, freshly ground
- Brown sugar: 1 tbsp
- Vinegar: 1/2 cup apple cider vinegar or malt vinegar
- Optional spices: 1 tsp smoked paprika, 1 tsp garlic powder, 1/2 tsp chili flakes for heat
- Hooks or skewers for hanging
- Drying area: Biltong box, dehydrator set to low, or a cool, well-ventilated room with a fan
- Paper towels for patting dry
Instructions
- Choose and trim the meat. Pick a lean cut with minimal connective tissue. Trim off thick surface fat to prevent rancidity, but leave thin fat layers if you enjoy richer flavor.
- Slice into strips. Cut the meat with the grain into long strips about 2–3 cm (3/4–1 inch) thick. Thicker strips take longer to dry and stay chewier; thinner strips dry faster and firmer.
- Toast the coriander. In a dry pan over medium heat, toast coriander seeds for 1–2 minutes until fragrant.Coarsely crush with a mortar and pestle or a rolling pin. This boosts aroma and texture.
- Mix the dry cure. In a bowl, combine salt, crushed coriander, black pepper, and brown sugar. Add optional spices if you like heat or smokiness.
- Season the meat. Sprinkle the dry cure evenly over all sides of the strips.Don’t cake it on—aim for even, light coverage so flavors penetrate without overwhelming.
- Add vinegar. Place the seasoned strips in a non-reactive dish. Drizzle vinegar over the meat and toss to coat. The vinegar helps with flavor and preservation without “cooking” the meat like citrus might.
- Marinate. Cover and refrigerate for 8–12 hours.For a stronger cure and saltiness, you can go up to 18 hours. Turn the strips once or twice so everything marinates evenly.
- Drain and pat dry. Remove the meat and lightly dab off excess liquid with paper towels. Don’t rinse.A slightly tacky surface helps the drying process.
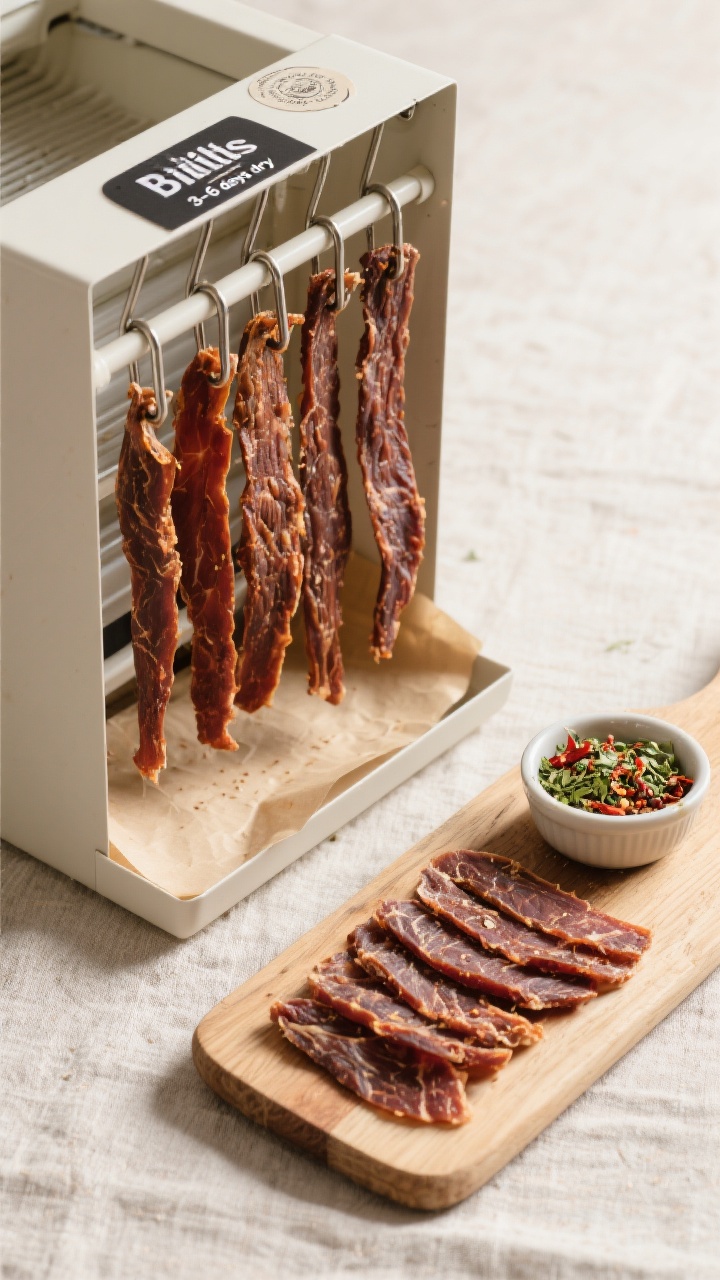
- Prepare your drying setup. If using a biltong box, ensure airflow and a low-watt bulb or gentle fan. If using a dehydrator, set it to 30–40°C (85–105°F) with good airflow. For a cool room, use a fan to keep air moving and avoid humid areas.
- Hang the strips. Thread hooks through one end or use skewers.Hang with space between pieces so air can circulate. Place a tray or paper underneath to catch drips.
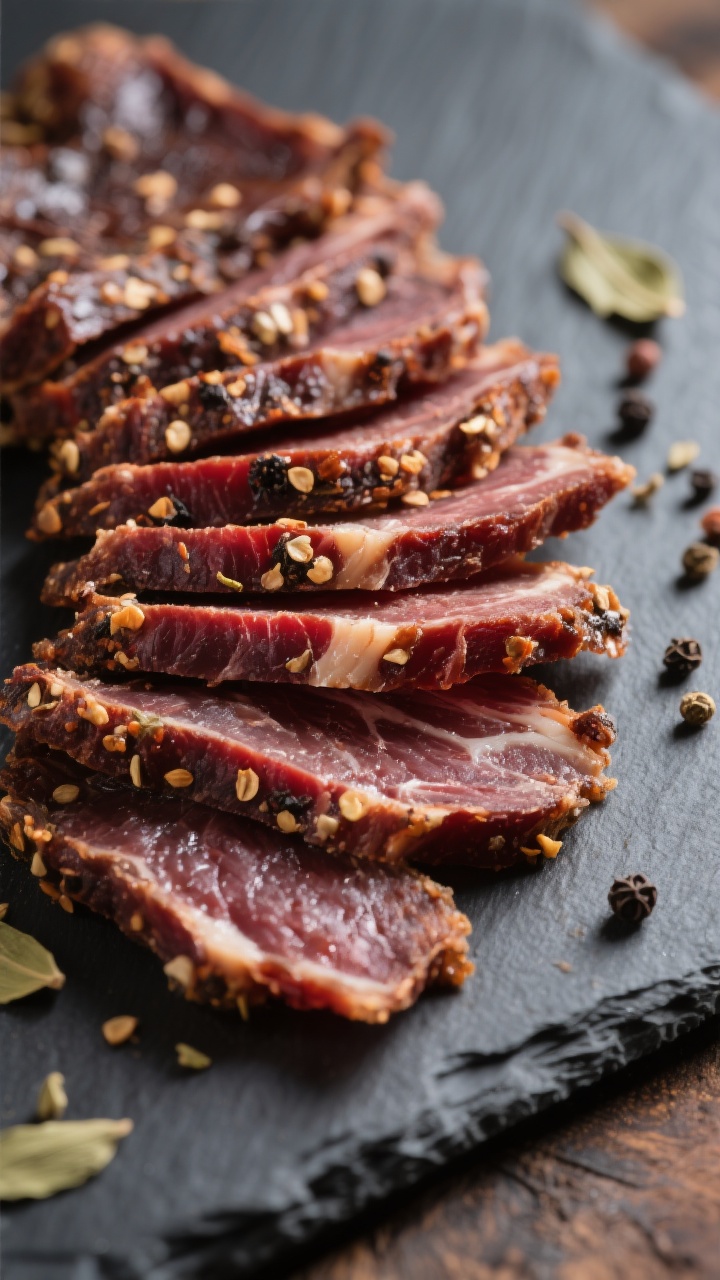
- Dry until done. Typical drying time is 3–6 days depending on thickness, airflow, and humidity. For wetter biltong, start checking around day 3.For drier, go longer. The center should be dark red to mahogany with slight give when squeezed.
- Test and slice. Cut a piece open. If it’s too soft, dry another 12–24 hours.If perfect, slice thinly across the grain for tender pieces, or along the grain for a chewier bite.
- Optional finish. Lightly brush off excess spice fragments if you prefer a cleaner surface. Store properly once fully cooled and dry to the touch.
Keeping It Fresh
Once dried to your liking, store biltong in a breathable bag or paper bag for the first day to let residual moisture equalize. Avoid sealed plastic at first, since trapped moisture can cause mold. After a day or two, move to an airtight container or vacuum-seal for longer storage.
Keep it in a cool, dark place for up to a week if it’s on the drier side.
For longer storage, refrigerate for 2–3 weeks or freeze for up to 3 months. Always check for off smells or fuzzy growth; when in doubt, discard.
Why This is Good for You
Traditional biltong is high in protein and low in carbs, making it a steady, satisfying snack. It’s naturally rich in iron and B vitamins from the beef.
Compared to many store-bought jerky options, you control the salt, sugar, and additives. Choose lean cuts and moderate spice to keep it simple and nourishing.
Pitfalls to Watch Out For
- Too much humidity: Damp air invites mold. Improve airflow, add a fan, or use a biltong box in humid climates.
- Over-salting: Leaving the cure on too long or using too much salt can make it harsh.Stick to the amounts and timing, and slice thicker pieces if you want a gentler cure.
- Thick fat layers: Large fat caps can go rancid. Trim them down before curing.
- Insufficient spacing: Crowded strips dry unevenly. Keep gaps between pieces.
- Heat that’s too high: High temperatures can “cook” the meat and spoil texture.Keep it low and steady with good airflow.
Alternatives
- Game meats: Try venison, kudu, or elk for a lean, robust flavor. Adjust drying time based on thickness.
- Vinegar swaps: Malt vinegar is classic, but apple cider vinegar adds a gentle fruitiness. White vinegar works if that’s what you have.
- Spice variations: Add chili flakes for heat, smoked paprika for depth, or a touch of garlic powder.Keep coriander as the anchor.
- No hanging option: Lay strips on dehydrator racks with space between. Flip halfway for even drying.
- Lower-salt approach: Reduce salt by 20% and shorten marinating time, but storage life may be shorter. Keep it colder and consume sooner.
FAQ
How do I know when biltong is ready?
It should feel firm on the outside with a slight give in the center.
Slice into a piece: the middle should be a deep reddish-brown, not raw-looking or squishy. If it’s too soft, dry longer; if it’s brittle, shorten next time.
Can I make this without a biltong box?
Yes. A dehydrator on low with good airflow works well.
You can also hang the meat in a cool, dry room and keep a fan running. Avoid warm, humid spaces.
What if I see white spots?
Salt crystals can appear as tiny white specks and are harmless. Fuzzy white, green, or black growth is mold.
If you spot mold, discard the affected pieces and improve airflow, salt level, and hygiene next time.
How thin should I slice before drying?
About 2–3 cm thick is a good starting point. Thicker pieces take longer and stay moister; thinner pieces dry faster and firmer. Consistency in thickness helps even drying.
Is biltong the same as jerky?
No.
Jerky is usually marinated in a wet sauce and dried with heat, often sweeter and smokier. Biltong is dry-cured with vinegar and spices, then air-dried at lower temperatures for a denser, meatier texture.
Can I reuse leftover marinade?
No. Discard any liquid that the raw meat has been in.
If you want extra spice on the surface, sprinkle fresh crushed coriander or pepper before hanging.
Do I need nitrates or preservatives?
Traditional biltong does not use curing salts. Proper salt levels, vinegar, cleanliness, and good airflow are the primary safeguards. If you prefer added insurance, consult curing guidelines, but it’s not standard for classic biltong.
In Conclusion
Traditional biltong is simple, flavorful, and satisfying to make at home.
With a few pantry staples and a patient drying process, you’ll end up with a snack that’s rich, clean, and deeply savory. Start with the basics, then tweak thickness, spice, and dryness to your taste. Once you make your own, you may never go back to store-bought.
Printable Recipe Card
Want just the essential recipe details without scrolling through the article? Get our printable recipe card with just the ingredients and instructions.